REARING SATURNIIDAE OUTDOORS


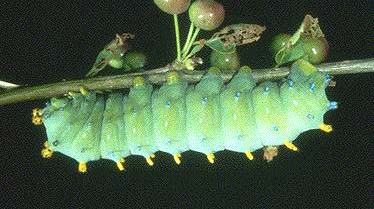
Thousands of people, all over the world, have reared saturniidae. For most, the experience has largely been one of finding a few larvae, taking them home, feeding them some leaves in an aquarium, large jar, etc., watching them spin their cocoons, and then waiting for the adult emergence. Many people have found an H. cecropia larva on an ornamental tree in the yard.


Breeders who supply zoos, research projects, individual hobbyists, etc., usually do not have the time or space to raise large numbers of larvae anywhere but outdoors in large sleeves or cages over host food plants. Here, a relatively small, fibreglass sleeve, as might be used for A. luna larvae on sweetgum or A. polyphemus larvae on oak, graces a front yard tree. Sleeves can be made of any kind of material that allows a regular air flow, protects the larvae from predation, and allows sunlight to get to the foliage.


This article is a step by step guide to the rearing of large numbers of saturniidae in outdoor sleeves. One can start at any one of the four metamorphic stages: 1) ova, 2) larva, 3) pupa/cocoon, 4) moth.


MOTHS AND OVA


Photo courtesy of Mike Soroka. A cage mating of cecropia

Most females of the large saturniidae lay tiny eggs, either singly or in small rows on the underside of leaves. Trying to find these eggs would be like looking for a needle in a haystack. Most people obtain ova in the following ways:
1) obtain them from a dealer,
2) capture a gravid female at a light,
3) obtain cocoons from a dealer or from the wild and secure a mating.


2)

Males and females of most large saturniidae are attracted to lights, especially mercury vapour or black lights. I have purchased both types of lights from hardware stores and use them regularly to attract females. Mercury vapour lights are often used as floodlights or security lights on large buildings: schools, warehouses, car dealerships, etc. I have a five mile circuit that I make quite regularly during prime flight times in the spring and summer to visit such sites from 11:00 pm to 1:00 am looking for moths. Police are notified and landowners' permission is obtained in advance. A warm, overcast, moonless or at least "dark", night offers the best collecting.

Moths quickly alight on the walls of these buildings and become mesmerized by the light in a matter of ten minutes or so. At that time they can be gently removed with the fingers, or if the moth is high up, with a long stick. I use two 8 foot pieces of 3/4 round moulding, taped together to make a fifteen foot rod, to gently dislodge moths beyond my normal reach. Once mesmerized by the light, these moths will float to the ground like falling leaves when gently dislodged by the pole.

Females can be distinguished from males by the females' much lesser developed antennae, and almost all females picked up at lights have already mated as females seldom fly before mating. A captured female quickly goes into a large paper grocery bag, the top is folded down, and the bag and moth are set in a quiet, dark place. Don't be alarmed if the female doesn't lay eggs the first night. Unless she is spent, she will likely deposit upwards of 200 eggs over a 5-7 day period on the insides of several bags. I usually move the female to a new bag every day or so.

3) Wild cocoons of several species can be found quite readily if one takes the time to look. See the cocoon section. Cocoons can also be obtained from breeders.
Once obtained, the cocoons should be kept in conditions as natural as possible so that emergence times will coincide with native populations. I have had good success keeping cocoons in tightlyy lidded plastic containers in the refrigerator crisper (protection from predation and controlled emergence times) or outdoors in unheated sheds or garages. Some breeders keep cocoons in outdoor cages which are fully exposed to the elements. I take cocoons out of storage 3-4 weeks before I want the pupae to eclose. Warmer temperatures and sunshine hasten emergences. The cocoons are put into emergence cages which will allow the moths to climb and "hang" themselves for wing inflation. Door screen cages or 3/8 inch mesh cages work quite well. In most instances siblings will mate right inside the emergence cage, but sometiomes there is a reluctance for siblings to pair. I prefer to move, around 8:00 pm, my females to cylindrical mating cages. These cages have a 1/2-3/4 inch mesh, a 9 inch diameter, and are 14 inches high. Wild males can mate with the females right through the mesh. The cages are put out after dark in places where cats won't disturb them. I live in a rural area in a house surrounded by woods. I put my cages out on the balcony and turn all lights off. Cages are checked around midnight and, if a mating has occured, the cage is brought indoors, leaving the pair undisturbed, and placed in a dark spot. If a mating hasn't occured the cage is left outdoors and rechecked just before sunrise. The process is repeated until the moth has mated. The pair is left undisturbed until the moths separate the following evening, at which time the female goes into the paper grocery bag. The paper bags are checked daily and the female is moved to a new bag daily or every two days.

Ova are fertilized as they are deposited. By moving the female to a new bag daily, all the ova from any one bag will emerge within a 24 hour period.
Small patches of paper with the ova still attached are cut out of the bag and these patches are put, egg side up, in small tightly lidded containers, i.e., glass jars, salad trays, sandwich containers, etc.. Dates are recorded. It is very important not to put any food in the egg containers until after the larvae have emerged. The leaves would give off carbon dioxide, a relatively heavy gas, that might suffocate the eggs. Most larvae will eat a portion of their eggshells upon emerging and can go for almost a day without food. As soon as larvae are seen in the container, however, a leaf or two should be offered. The larvae will quickly crawl onto the food plant and should start feeding within an hour or so.
Sometimes, if I am extremely busy, or will be away from home for a vacation when eggs might emerge, I tear the bag in half and carefully position the paper-egg bag, egg side down, over a branch of a food plant in a large out door sleeve. To protect the eggs from rain and being soaked off the bag, I usually tape a sheet of tinfoil to the outside of the paper. I usually also tape the paper bag to a branch or two, making sure no sticky tape portions are exposed. When the larvae emerge, they simply crawl off the paper bag and onto the food in the sleeve.

LARVAE


Larvae containers are inspected daily and new food is added by lifting the old leaf, cleaning the bottom of the container, replacing the old foliage with larvae still attached, and inserting the new leaves. Occasionally you will have to "lift" a caterpillar from the container bottom or side. I usually use a sharp tipped pencil, and carefully slip or position the point under the forelegs. The larva will usually grasp the pencil and can then be transferred to the fresh leaves by gently brushing with a fine water-color brush or another sharp pencil or even your finger. After an hour or so, all the larvae should have moved to the new foliage. Those who haven't should be aided with a pencil and the old leaves should be removed from the container. After three days I generally move the larvae to their outside home, a large sleeve which has been placed over a tree branch or over the top of an entire tree.

Larvae pass through growth stages called instars. They have to shed old skins to make room for new growth. It is generally not a good idea to move larvae while they are reparing or attempting to shed skins. Most saturniidae larvae spend about 6-8 days in their first instar and that is why I like to move larvae outdoors after only 3-4 days in their indoor hatching containers.

For most of my outdoor sleeves I use Remay cloth, a very light weight, spun-bonded polyester that was designed to be used by gardeners to protect early spring plantings. I like to use very large sleeves so I purchase my sleeve material in 12' by 300' rolls. You can purchase much smaller cuts from most garden centres or agricultural suppliers. For my large bags, I cut the 12' wide material into 12' lengths and triple stitch one side and one end. These bags will nicely cap the 12-15 foot pin cherry (cecropia, io, promethea, and cynthia) and white birch (luna, polyphemus) trees that I use for food sources. I roll out or unfold the Remay sleeve on the ground so that the open end is about 7 feet from the base of the tree. Then I grasp the tree trunk about 6 feet from the ground and gently begin to bend the tree toward the sleeve. As the tree bends, I move my hands up further on the trunk. Once I'm around the 9-11 foot mark, my feet are just about at the open end of the sleeve lying on the ground. Making sure I can hold the tree down with one hand, I use one foot to lift the sleeve to my other hand, and then begin to sleeve the tree by carefully drawing the sleeve over branches and bending and inserting stems, gradually working my way down the trunk. The whole process works much better with an assistant, but I cap many large trees this way entirely by myself in a ten-fifteen minute process.

At the other extreme, I used a 4' x 4' sleeve with two open ends for rearing H. gallii larvae on fireweed (Epilobium augustifolium). At approximately 1 foot from the ground I gathered two closely growing up right stems and used a garbage bag twist tie to hold them together. I slid the sleeve over the two stems and tied the bottom shut with a piece of cotton twine. Ten-twelve small larvae were placed, still attached to cut food from the hatching container, on the upper leaves in the sleeve. I gathered in the top by bringing in four points to a center, folded the cloth down twice with 1/2 inch foods and secured the folds with three clothespins.

I use varying sizes for sleeves depending on the nature of the food plantI wish to cover. I commonly use 6'x6' and 8'x8' sleeves on alder bushes for cecropia, on willow branches for S. cerisyi (sphingid) and A.io, and on larch for H. columbia.

For sleeves that are going over horizontal branches, I like to sew one end shut, but leave an unsewn strip (frass slot) about 8 inches long in one corner. I try to cover the branch while leaving this slot in the lower outer corner. The slot is secured with a double folding and a clothespin or two. To remove leaf and larvae droppings, I just open the slot and gently shake out the frass.

Care should be taken not to break branches, not to let larvae completely defoliate sleeves tree or branches, and not to try to "cram" too much foliage into the sleeve. A sleeve which lets branches hang normally is most appropriate.

I am a school administrator and am usually quite busy in June with school work. I don't have much time to sleeve many trees. Usually I will start 100-150 three day old larvae in a single large sleeve. As time permits I will sleeve other trees/branches and divide larvae into smaller and smaller numbers/sleeve as they grow. Twenty-thirty fourth instar cecropia would be plenty in one 12'x12'sleeve. Over crowding invites disease and letting the larvae completely defoliate trees/branches invites predators: birds, wasps, stink bugs, etc.

When a sleeve needs to be changed, I cut some branches and put them in a 5 gallon bucket. Larvae which are on tree bark are gently hand-removed by lifting, moving from the head rearward. Small branches, twigs, and leaves with larvae attached are snipped and carefully deposited onto fresh food in the bucket.

After a few minutes larvae generally will have moved to fresh food. These branches are carefully placed in a new sleeve, and, as much as possible, are laid diagonally across and on top of the live branches. The open end of the sleeve is tied shut with cotton twine around the branch or tree trunk.

Saturniidae larvae are usually left in the sleeves to spin cocoons. Some species (cynthia and promethea) always use a leaf wrap and remain attached to branches. Other species sometimes use a leaf wrap, (luna, cecropia, polyphemus), while others either spin attached to branches or trunks (cecropia, columbia) or in the folds of the sleeve--a most annoying practice: polypphemus, cecropia, luna, io.

When sphingidae are ready to pupate, they will attemt to climb down the tree trunk to reach the ground. Some larvae (modesta, cerisyi) have mandibles strong enough to chew holes right through the sleeve material. I watch these larvae carefully and daily remove larvae which are ready to pupate and put them in large buckets, lined and bottom-filled with loose paper towelling, in a warm dark place. Sphingidae usually pupate in the towelling in 4-5 days.

Some breeders double sleeve,ie, they put a larger sleeve over the smaller sleeve to discourage predators. Heavier materials can also be used for sleeves, but they are generally much more expensive and more difficult to work with. Fibreglass or steel screening are examples. I have seen white faced paper wasps, however, chew through fibreglass and nylon mesh to get into sleeves. The best way to deal with wasps is to find the nest and burn them out after dark.


COCOONS

Cocoons in sleeves should be gently removed after the larvae have pupated, usually within 5-6 days after spinning, depending upon temperature. Cocoons can be stored in protectice boxes or cages in unheated sheds or garages or in loosely lidded containers in the refrigerator crisper. Cocoons should never be chilled, i.e., stored in the refrigerator, until larvae have pupated. Cold temperatures will lower metabolism to the extent that larvae are not able to pupate.

Even in the protective setting of a rearing sleeve, larvae will sometimes encounter parasitic wasps or sometimes develop disease. Cocoons should be inspected via a gentle shaking. If there is no sound from a cocoon, parasitic wasp larvae have probably exited the caterpillar within the cocoon and spun their own cottony cocoons inside the moth cocoon. If there is a dry, rattling sound, disease has probably taken its toll on a now shriveled and dried caterpillar.

It usually does not harm the pupa, to make a small longitudinal slit and actually open the cocoon for inspection of pupa. Some breeders do this routinely to sex the pupae. The outline of antennae is clearly visible on the pupal shell.

[ HOME ]